
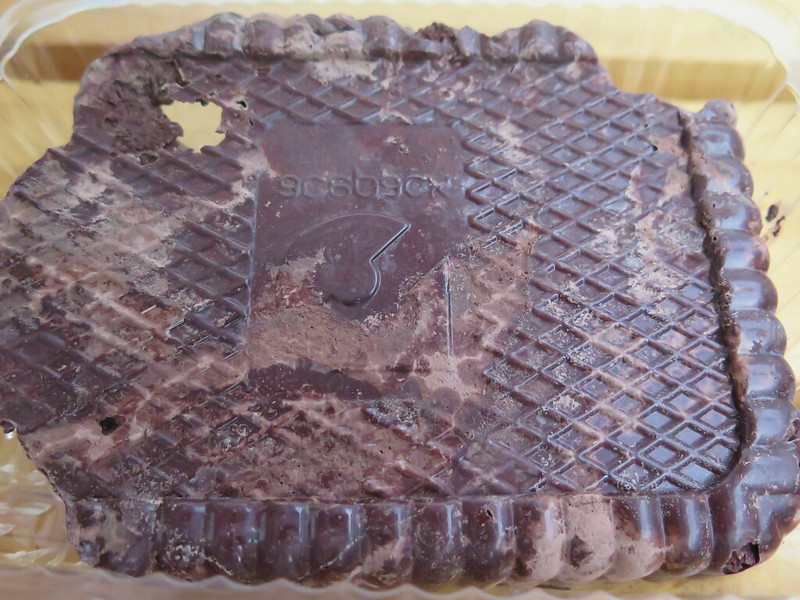
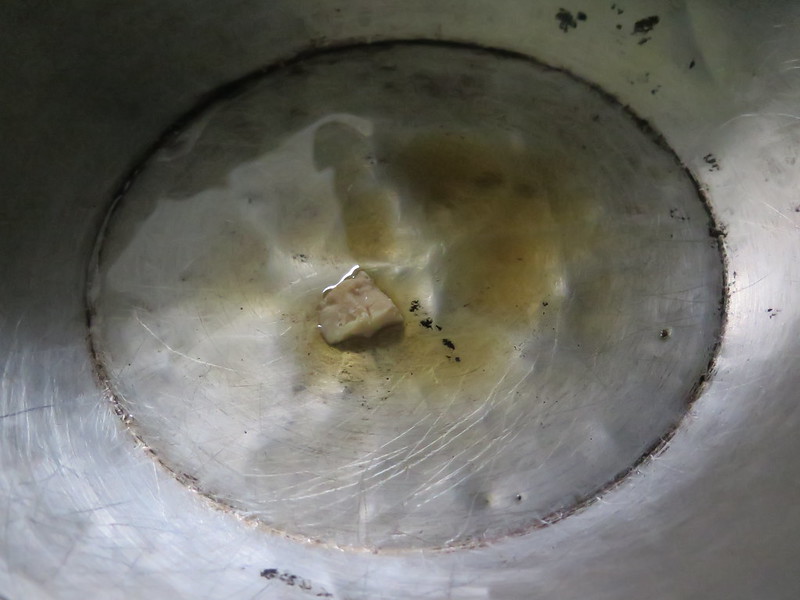
When we last left off, I was turning the cacao nibs we roasted in Costa Rica into powder via an uncooperative coffee grinder. It did not look promising. While the cacao mixture had liquefied as expected, it seemed grainy. I dumped it into a container and then placed in the fridge, where it solidified into this mass by next morning:
I paused at this point because after reading various chocolate-making resources, I learned that I wasn’t going to be making anything except the darkest chocolate without cocoa butter. It would be something that hovered around 82% chocolate*, which is definitely not my cup of tea. Or bar of chocolate.
While it was possible we might find cocoa butter somewhere in Medellín, I didn’t have high hopes. Because it’s needed to make chocolate and much of it can be lost in processing cacao, cocoa butter is the most valuable part of the cacao mass. Most chocolate-makers order it from sources online, so what are the odds I’d find some that someone selling it in a shop? We were also heading to the tiny town of Guatapé for two days, so the likelihood I’d find cocoa butter soon was nil. Right?
It turns out that the old adage about finding things in the least likely places is true. While in Guatapé we encountered José, the owner of La Tiendita de Chocolate and full time chocolate-maker. As luck would have it, he had just ordered a huge amount cocoa butter to work with, and he agreed to sell us a couple of ounces for about $2 USD. “It’s funny,” he told us, “I just got cocoa butter for the first time last week. I’ve never had it around before then.” How’s THAT for good timing on our part?

With cocoa butter in hand**, I returned to Medellín to complete our chocolate making adventure. The first step was to assemble the ingredients: the cocoa mass, the cocoa butter, sugar, and milk powder. Milk powder isn’t generally used in dark chocolate, but I figured I could try making some dark milk chocolate. I took multiple recipes and mashed them together, aiming for roughly the following ratios:
5 parts cocoa mass
1 part cocoa butter
2 parts sugar
2 parts milk powder
The first thing I did was put the coffee grinder through one more round of grinding-things-it-shouldn’t be. I wanted the chocolate to be as smooth as possible, and without water sugar doesn’t dissolve, leaving a sandy texture. I put several tablespoons into the coffee grinder and created a fine powder.
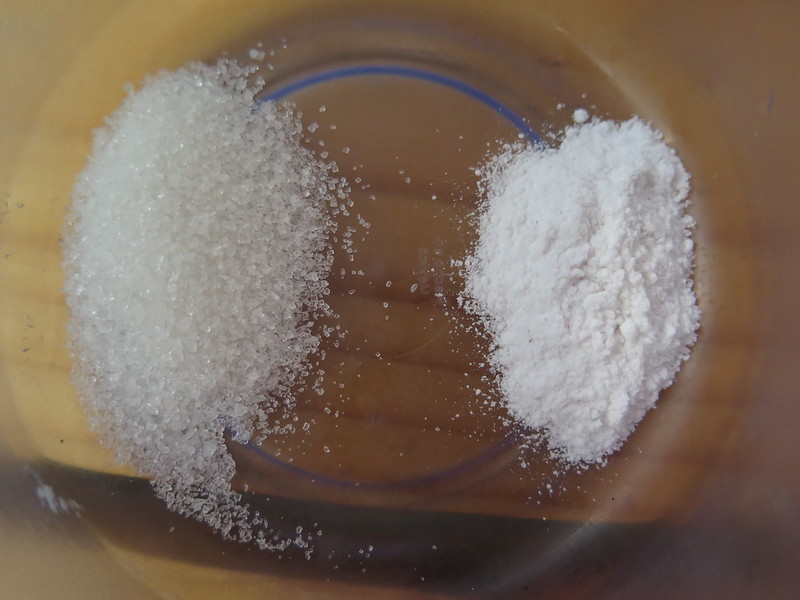
I did the same with the powdered milk, but it turns out that the powdered milk was indeed powder, and the grinding had no effect:

Then I got down to working with the cocoa mass. In hopes of making the cocoa particles finer, I tried to give it a second grind in the coffee grinder, but the poor thing had finally had it and started jamming. Thankfully, there was a blender in the hostel kitchen. I broke the cocoa mass into pieces and tossed it into the blender:
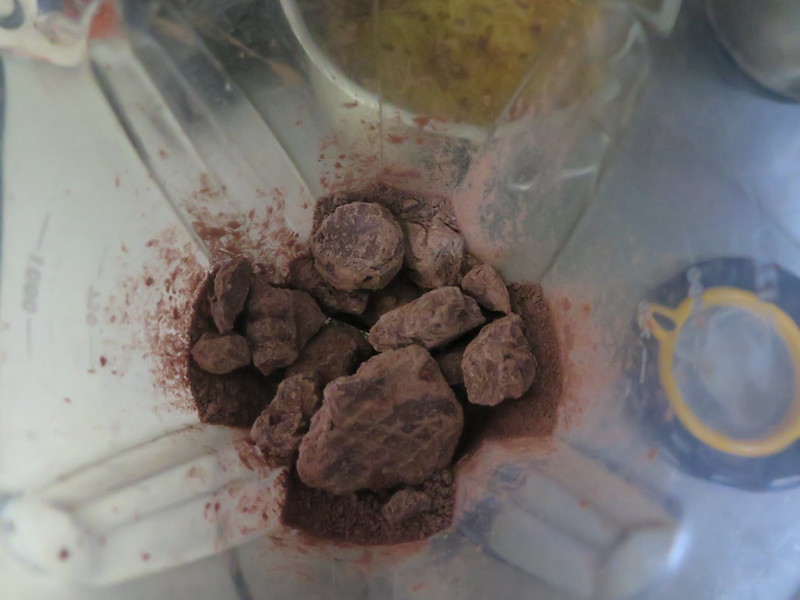
After several minutes of grinding, I got powdered cocoa mass but nothing finer. I decided to abandon making it finer and tossed in the ground sugar, so at least the blender would have a chance to start the mixing process:

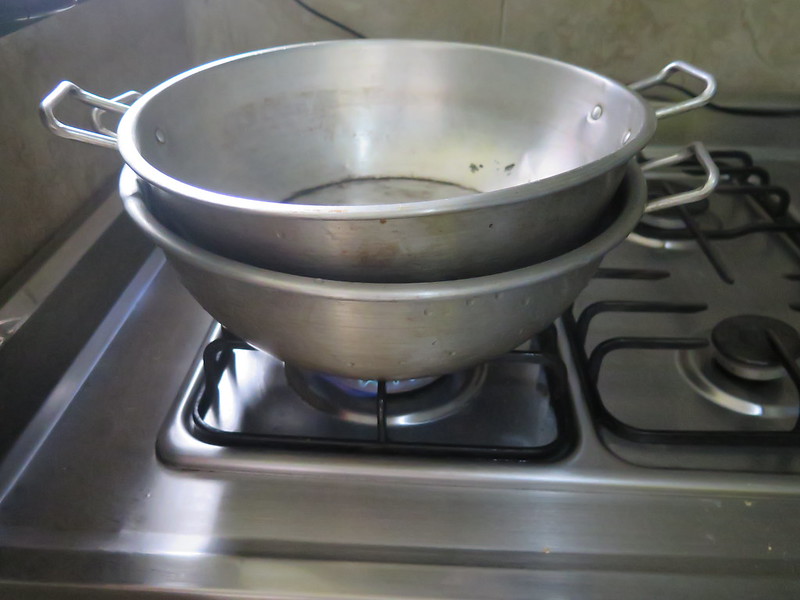
Now that the cocoa mass-sugar mix was ready, it was time to start the chocolate making process. Since direct heat is anathema to chocolate, I fashioned a double boiler out of pots found in the kitchen.
I let the water heat for a few minutes, then I tossed the cocoa butter (about 1 oz.) into the double boiler. It immediately started to melt and release the most amazing smell ever–think chocolate combined with melted butter and vanilla.
Once the cocoa butter was melted, I tossed in the whole chocolate-sugar mixture and began stirring:
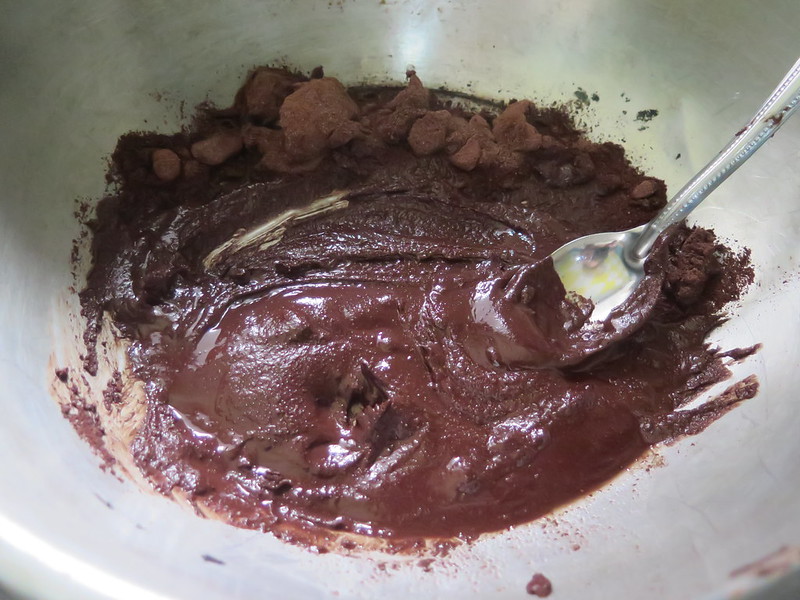
Amazingly, the cocoa mass began to melt and smooth out, so that it was nowhere as grainy as I thought it would be! I kept stirring, and the mass continued to melt until I had shiny, smooth chocolate:

What followed was a long process of taste-refining. I stuck my finger in the chocolate and found it was still extremely dark and bitter. I tossed in a couple more spoonfuls of sugar, and a bit milk powder, and then tried it again. It was better, but still too dark for my tastes. I repeated this process until I had something that tasted like something between a milk and dark chocolate. The final ratio of ingredients in my chocolate was probably closer to the following:
4 parts cocoa mass
1 part cocoa butter
2.5 parts sugar
2.5 parts milk powder
Having somehow accomplished fermenting, roasting, grinding and melting chocolate all in a hostel setting, I ran into a final challenge: how do I temper chocolate without a concher or some kind of surface to mix it on? Tempering is the mixing of chocolate in the right conditions such that it will form ideal crystals. It’s what gives chocolate its characteristic gloss and snap. There are two tempering methods: you either use a thermometer and mix chocolate continuously at very specific temperatures, or you seed your newly-made chocolate with an already-tempered piece of chocolate and it magically teaches your chocolate to form the right crystals***.
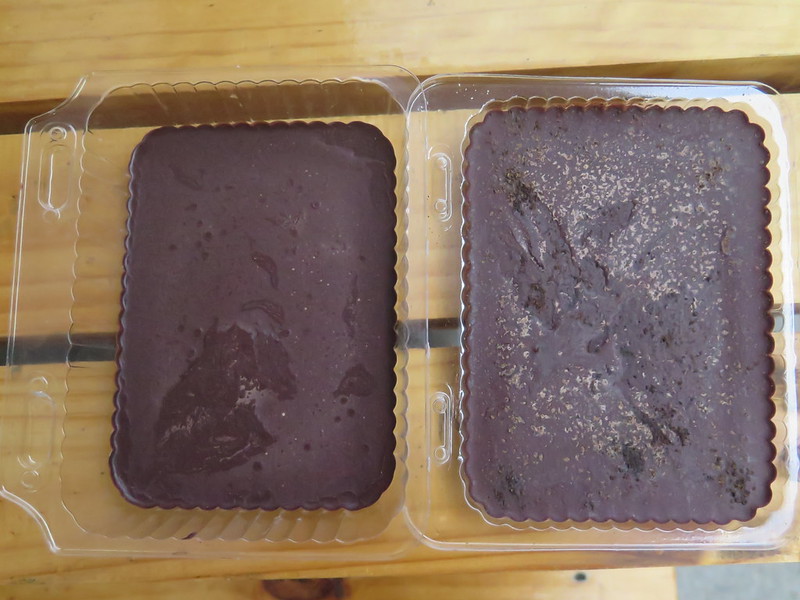
Unsurprisingly, the hostel kitchen didn’t have a thermometer. I also didn’t have any chocolate to seed with. I settled on the solution of instead reheating my chocolate once more on the double boiler while mixing continuously, then continuing to mix for several minutes after taking off the heat. Finally, I spooned the chocolate into molds (our old leftovers container, used previously for the cacao mass):
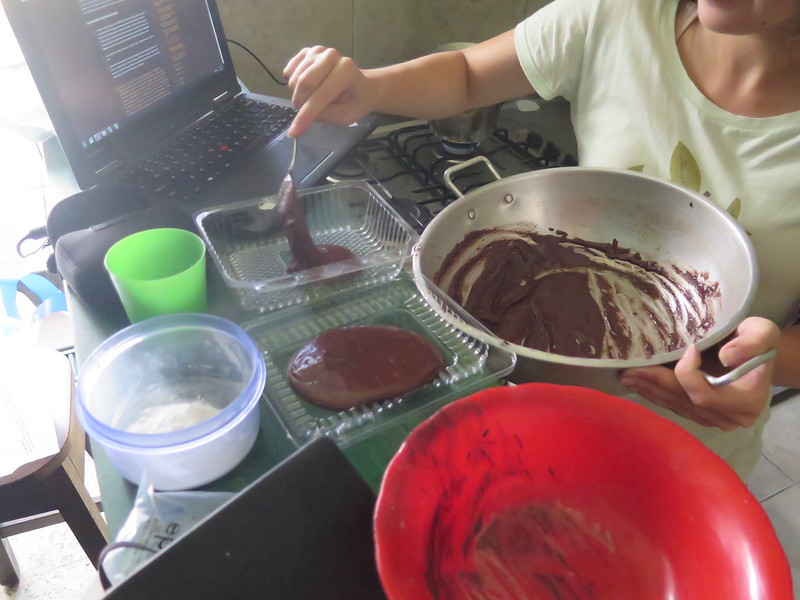
Since I wasn’t optimistic about the chocolate flavor, I also ground some cloves and sprinkled the clove powder on top of one of the chocolate bars. I figured that at worst, the strong spice of the cloves would help offset any burnt flavors in the chocolate.
I tapped the chocolate containers a few times to remove bubbles, then I left them to set. Unfortunately, a few hours later they were still pretty runny:
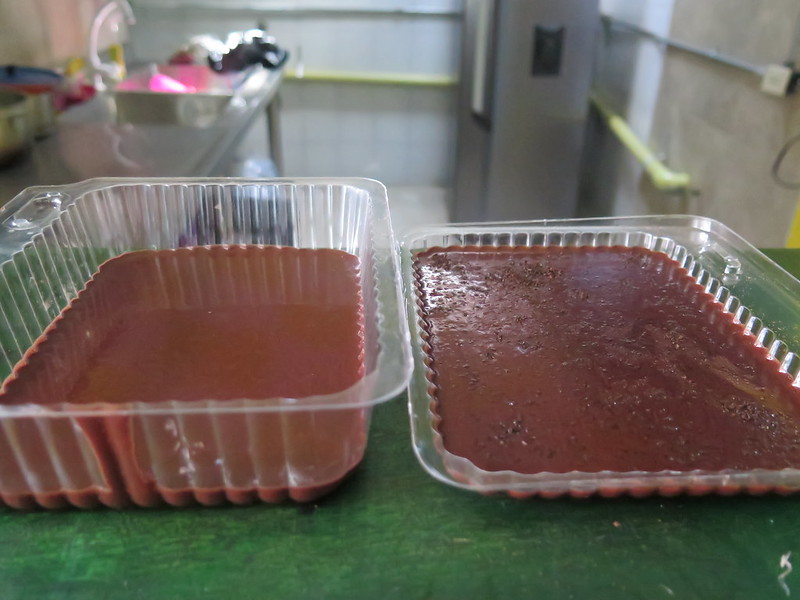
This wasn’t entirely unexpected, as Jose had mentioned that too much cocoa butter might prevent the chocolate from solidifying. I had read that I shouldn’t put chocolate in the fridge to set because moisture will damage it or cause seizing. But I figured committing heresy and having poor quality chocolate was better than it spilling everywhere or having it filled with flies who drowned in chocolatey paradise. I placed both bars in a paper bag and slid them into the fridge.
Miraculously, when I pulled the chocolate out an hour later, it wasn’t ruined and had hardened quite nicely. There was some evidence for bloom on the tops of the bars, but it was nowhere as bad as I thought it would be with my tempering job.
Flipping them out of the molds also revealed that the bars had a fairly nice shine, despite my approximated tempering. Whether I had actually done a good job, I had just been lucky, or the patterns on the molds had helped set the chocolate properly remains to be determined. Maybe it was all three.
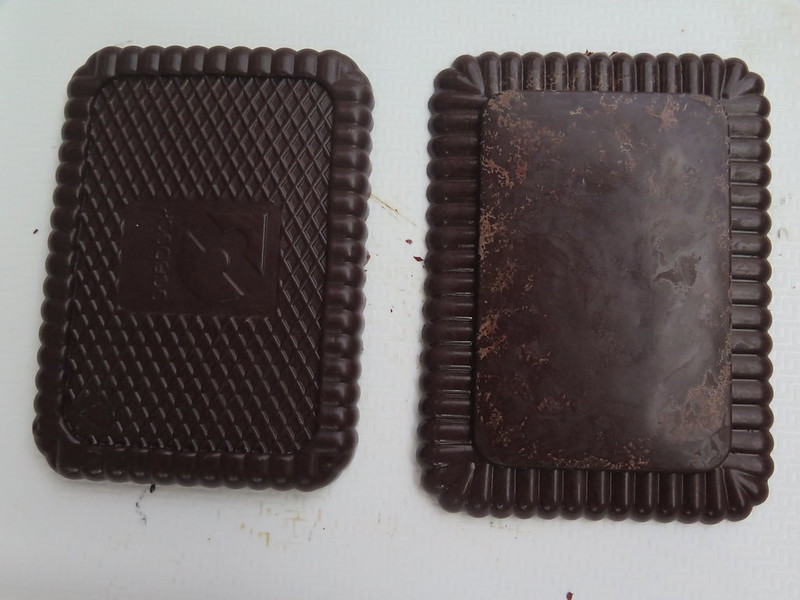
Then came the real test: the taste. Stoytcho and I snapped off bits of each bar and tried it. The chocolate was darker than I expected, losing some of the milky flavor during the cooling phase. The words I would use to describe the flavor profile would be bittersweet, fruity, and slightly burnt. It was definitely not the most balanced set of flavors, but it wasn’t awful. And the cloves bar was actually downright tasty, as the spiciness of the cloves helped offset the vague burnt undertones in the chocolate****.
So there you have it, everyone. Against all odds, poor resources, and an utter lack of experience, I have forged chocolate in hostel kitchens across two countries. I am a cooking god.
Attributions:
This project would not have been possible without the magic of the internet, Google, and the following resources: Kojo Designs, The Ultimate Chocolate Blog, Bean-to-Bar, Chocolate Alchemy, and José from La Tiendita de Chocolate in Guatapé. If you’re looking to make your own chocolate, their knowledge is phenomenal.
Notes:
*Ever wonder how the % on your chocolate bar is worked out? Well, if you’re working with cacao mass like I am, it’s simply the ratio of chocolate to other ingredients by mass. So an 80% chocolate bar is something akin to 5 oz. of chocolate and 1 oz. of sugar.
**Well, not really in hand. It would have melted. The melting temperature of cocoa butter is just under human body temperature, which is why chocolate melts in your hand (or your mouth).
***It’s not actually magic, but the more amazing power of science! “Seeding” a solution with a seed crystal, a piece of the material where the molecules have settled down the way you want, is fairly common in chemistry. You can use it to make awesome crystals.
****I should note here that the love of the clove bar was not universal; Stoytcho most definitely preferred the plain dark chocolate bar. But he likes extremely bitter, dark chocolate, which makes him weird. Right? RIGHT???

I enjoyed this entry so much, I ate 2 pieces of chocolate while reading it!
LikeLike
Natalie sweet Natalie, for next time please use confectioners sugar which is also powdered so you wont have the sandy texture, or if you don´t have it you can use the blender to make it from your favorite kind of sugar. a small food processor can be handy too to mix everything. For the very important heating process you may go with the double boiler or a microwave (which protects chocolate from humidity) using 30 seconds periods to melt the chocolate. keep on testing you´ll find out that with chocolate, the trip is as fun as the destination. so you´ll have double the pleasure
Jose
La Tiendita de Chocolate
LikeLike
What you did, Natalie, is really amazing, and, as I understood it, you made a contribution to the entire process of making chocolate ( tempering and putting the mixture to harden in the refrigerator) . Actually, in Trader Joe’s they sell bars that say that they are 86 % dark Colombian chocolate – I have not even tried it, but Stoytcho’s dad loves it 🙂
LikeLike
Thanks for the shout-out to The Ultimate Chocolate Blog! Looks like you did a great job making chocolate in a Hostel kitchen! Sounds like a fun project!
LikeLike
We could not have done it without your site. Thank you for sharing your knowledge!
LikeLike